 I am in LOVE with these! White Tiles turned --Polaroid Wannabe's--Slash Coasters! Ha, say that 5 times fast!
They are so so easy and so inexpensive {that's our favorite part}! I purchased roughly 40 coasters at our local Restore home store for $2.50! No Joke!
What you Need:
White Tiles {the ones I grabbed measured roughly 4 1/4" x 4 1/4"}
Mod Podge {I used the antique style Mod Podge}
Computer & printer
Scissors
Paper cloth or rag {if you use the antique style mod podge}
Ruler

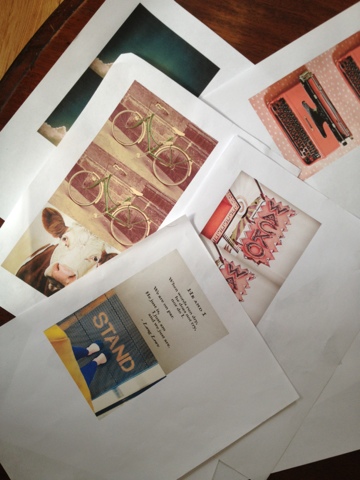
First step is to print off your pictures of desire! I searched for ones that had a little bit of artsy flare to them! A couple of them were from a talented photographer in the area {with her approval of course}, some I found on Flickr.com, & some were from my own photo library! It's an easy way to even display some of your Favorite Instagram pics! One can even use old photos from the family or all black and white ones! So many possibilities! Ahhhhh I love it! So once the pictures are saved to your computer I just used Microsoft office word {I am sure there are other programs to use but I found this the easiest to print of a picture in the exact size I needed} I opened up a new document and inserted my picture of choice! Once it plopped into the document I re-sized it to resemble a Polaroid- leaving a little space on the edges {top and sides} and of course leaving a larger white area on the bottom! This is where your ruler comes into play! I literally held the ruler up to the computer screen measuring each picture out so it gets to be the right size! It prints actual size that's on screen! I am sure that there is a ruler that you can pull up on your document but I am not that computer savvy! Print these suckers and then start cutting them out!
Now it's time to get down and dirty! Add mod podge to the bottom of the picture so it sticks to the tile and you can line it up! Once in place and air bubbles are pushed out add mod podge to the top of it {pressing out all air bubbles}! Once you have completely covered the top of the picture and along the edges this is where I grabbed a paper towel and wiped off the access glue-{the antiquing mod podge has a yellowish tint to it and I did not want it on the white edges so it would lose it's polaroid effect}
Let dry and Bam! You have your Polaroid Coasters! Too fun for words! I think these would make great gifts, a fun craft to do with friends! Share you thoughts and comments! We would love to hear from you!


